Creating and Securing an Auto-Scaling Group for EC2 Instances
Written on
Chapter 1: Overview of Auto-Scaling Groups
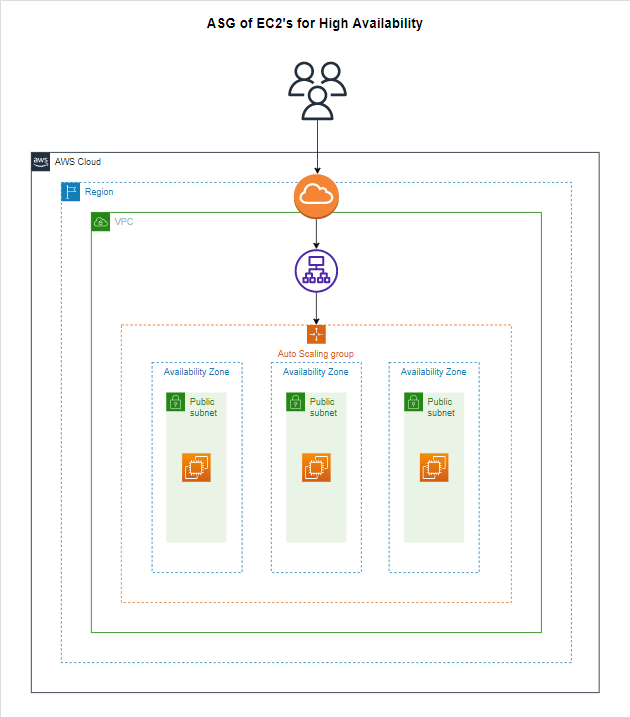
In this guide, we will establish a Virtual Private Cloud (VPC) featuring three public subnets, an Auto-Scaling Group (ASG) utilizing t2.micro instances with Apache installed, and an Application Load Balancer (ALB) to manage traffic to the ASG. Additionally, I will implement a target policy that triggers scaling when CPU usage exceeds 50%, ensuring the system's high availability.

Note to Readers: If you intend to replicate the steps in this guide, it's advisable to read through the entire document beforehand. I encountered some challenges during the project due to a few missteps, but I address these as we go along. A tip: create both security groups concurrently.
Important Note: With the current setup, internet access will only be available through your Application Load Balancer. To allow your public IPs to access the internet, you will need to modify your security settings.
Step 1: Create a VPC

Step 2: Create Subnets

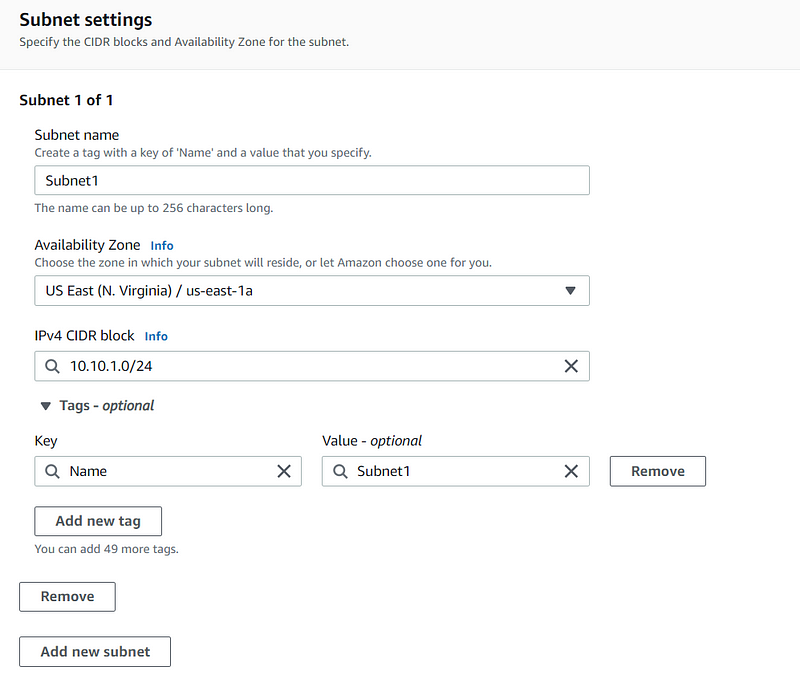
Select the VPC you just established, name your subnet, choose the Availability Zone (us-east-1a), and input the IPv4 CIDR block (I used 10.10.1.0/24). Your configuration should resemble the following:

Add the remaining two subnets by selecting "Add new subnet." Create one in us-east-1b with CIDR block 10.10.2.0/24 and another in us-east-1c with CIDR block 10.10.3.0/24.
Step 3: Create Route Tables

Name the route table, select the VPC, and create it.
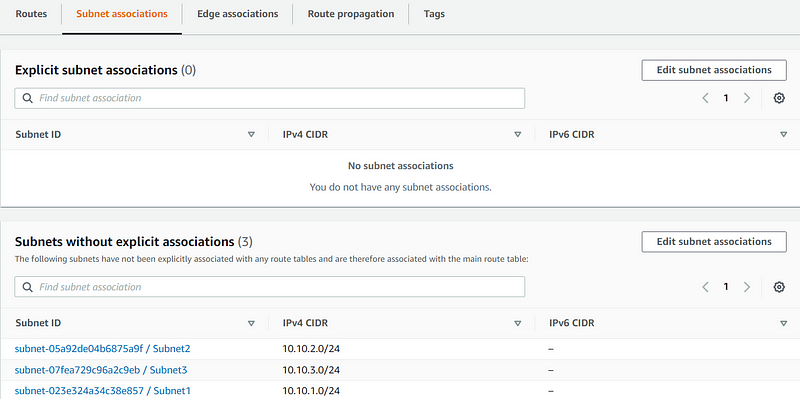
Now, scroll down, choose "Subnet associations," and edit the subnet associations.

Select all three subnets and save your changes.
Step 4: Create an Internet Gateway

Name the gateway and create it. Then, go to "Actions" and select "Attach to VPC."

Choose the VPC and attach it.
Now, return to the route tables, select the one associated with your three subnets, and edit the routes.

Add the internet gateway to the newly created route and save.
Step 5: Enable Auto-Assign Public IPv4 Addresses
I neglected this step initially. After saving your changes, go back to the subnets, select each one, go to "Actions," and edit the subnet settings.

Enable the auto-assign public IPv4 address feature, and save the changes for all three subnets.
Step 6: Create Security Groups
Proceed by creating a security group.

Name the group, choose the VPC, and add a rule for HTTP (port 80) to allow all traffic. This will be applied to the ALB later.
Step 7: Launch Template Creation

Name your launch template and check the Auto Scaling guidance box. Select your AMI (I'm using AWS Amazon Linux 2) and choose the instance type (t2.micro). Create your key pair, ensuring to choose a new one if you encounter SSH issues.
Step 8: Create Target Group

In the group details, check "Instances," name the target group, set the HTTP port to 80, select the created VPC, and choose HTTP/1.1. Hit "Next" and create the target group.
Step 9: Create Application Load Balancer
Now, navigate to Load Balancers and select "Create Load Balancer."

Choose "Application Load Balancer" and click "Create." Name it, ensure it is internet-facing, and select IPv4 as the IP address type. For Network mapping, select the created VPC and check all three Availability Zones/Subnets.
When prompted for security groups, add the one created earlier and in the Listeners and routing section, add the previously created target group.
Now, scroll to the bottom and create the load balancer.
Step 10: Create the Auto Scaling Group

Name the ASG, select the launch template you just created, and proceed. Choose the VPC and subnets, then select to attach to an existing load balancer and choose the earlier target group.
Configure the group size with a desired capacity of 2, minimum of 2, and a maximum of 5. Implement a target tracking scaling policy with a target value of 50.
Step 11: Configure Security Group for ASG
Create another security group.

Name it, attach it to the VPC, and add a rule for SSH from your IP and HTTP from the previous security group for the Load Balancer.
Step 12: Update the Auto Scaling Group
To apply the new security group to the ASG, modify the launch template. Fortunately, you can edit the existing ASG.

Change the launch template version to the new one. Ensure all other settings remain unchanged and hit "Update."
Testing and Final Steps
After completing these steps, you should only be able to access your application through the ALB DNS name. Terminate any prior instances to ensure the new ASG functions correctly.
To verify the scaling policy, SSH into one of the instances and execute the following commands to stress the CPU:
sudo amazon-linux-extras install epel -y
sudo yum install stress -y
sudo stress --cpu 8
Monitor the CPU utilization in CloudWatch. If the instances become stressed enough, the ASG should trigger the creation of additional instances.
This video demonstrates how to configure an Auto Scaling Group with an Elastic Load Balancer (ELB), providing a visual guide to the process.
This tutorial offers a comprehensive overview of Auto Scaling Groups, explaining their functionality and benefits in cloud computing.
Thank you for following along! I hope you found this guide informative.
Jason Wood
@jwood9799
