Mastering GitHub: A Step-by-Step Guide to Forking and Pushing
Written on
Understanding GitHub
GitHub is a web-based platform designed for software development, enabling users to store, manage, and collaborate on projects efficiently. It facilitates teamwork without jeopardizing the original project's integrity, making it an invaluable tool for developers.
Overview of the Process
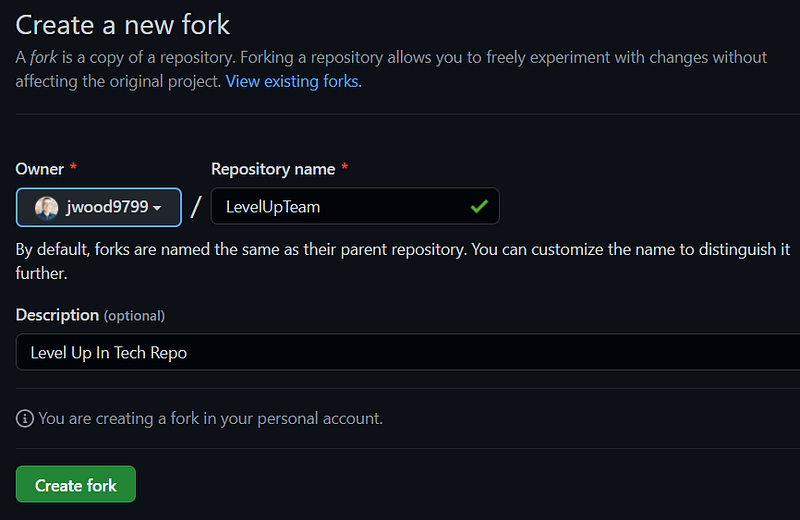
Recently, I was tasked with editing some code from my Level Up In Tech team. After making necessary modifications, I needed to return it for review before deployment. To do this, I accessed the code on GitHub and initiated a fork by simply clicking on the "Fork" button.
Creating the Fork
Once I clicked to create the fork, I made sure it was in my personal account.

Generating a Personal Access Token
After forking, the next step involved generating a personal access token, which I would use in place of a password later. It’s crucial to keep this token safe, as it cannot be accessed again once the page is closed. I decided to leave the page open for convenience.
To create my personal access token, I followed these steps:
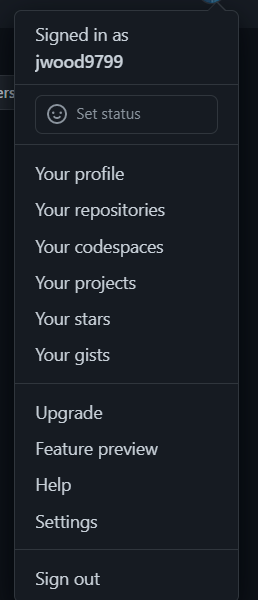
- Clicked on my profile picture dropdown and selected "Settings".
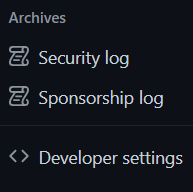
- On the left sidebar, I scrolled down to "Developer settings".
- Next, I chose "Personal access tokens" and clicked "Generate new token".
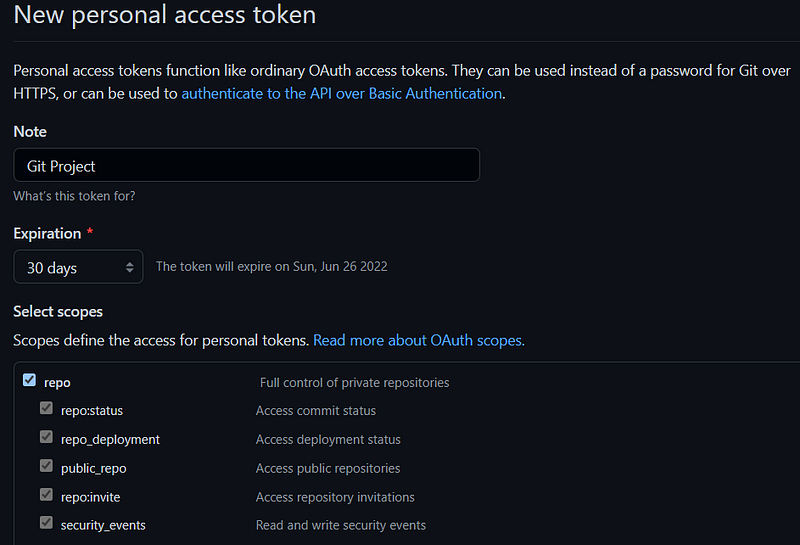
- I added a note titled "Git Project" for reference and selected "repo" under scopes, ensuring the token would work.

- Finally, I clicked the green "Generate token" button.
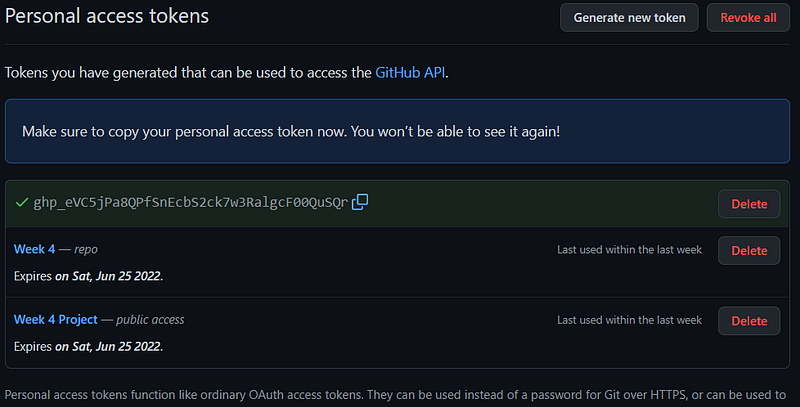
The token appeared on the subsequent page, which I needed to keep open for copying later.
Installing Git
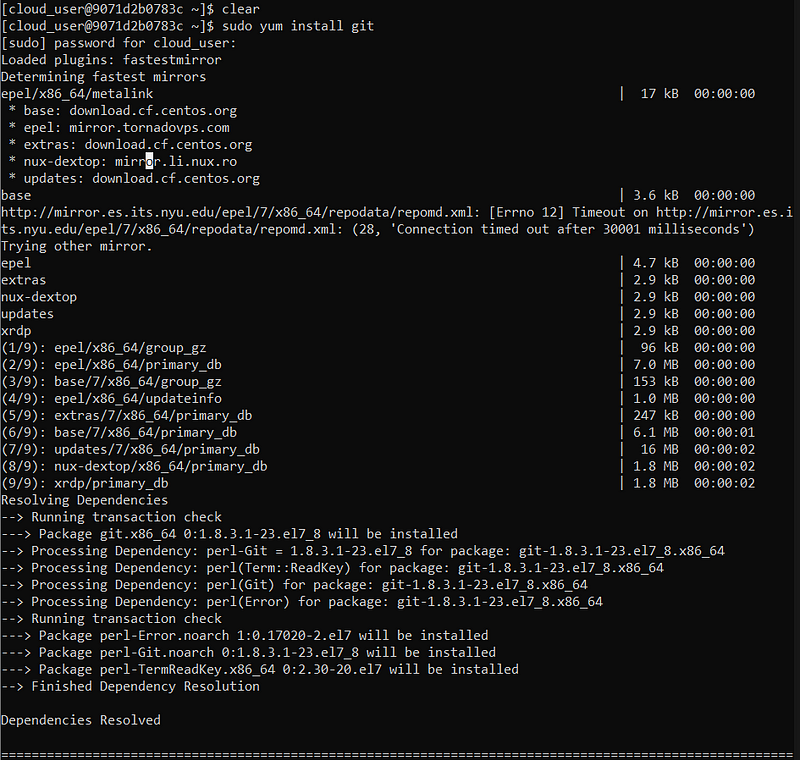
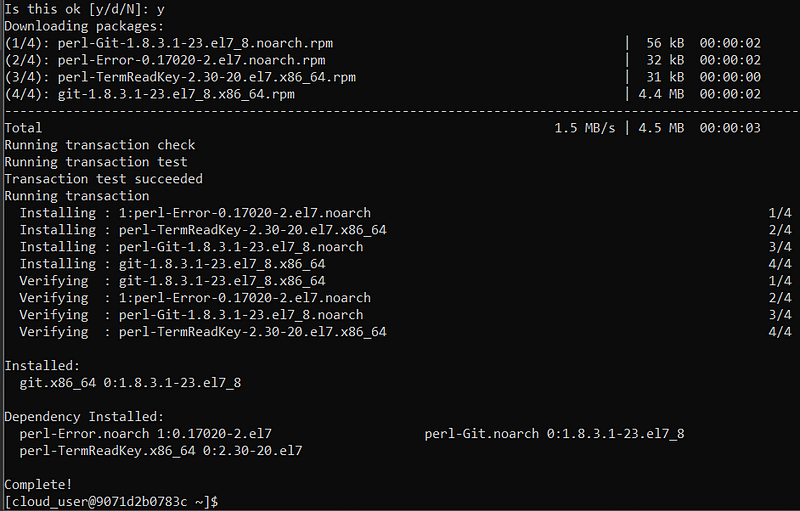
Now it was time to work in the command line. The first step was to install Git, which I did by running the command:
sudo yum install git
After entering my password, I confirmed the installation when prompted.

Configuring Git
Next, I configured my Git settings with my username, email, and preferred text editor:
git config --global user.name "Your Name"
git config --global user.email "[email protected]"
git config --global core.editor "vim"
Creating a Directory for the Clone
I needed to return to GitHub to copy the repository's address. Opening a new tab, I navigated to my team's repository and clicked on "Code" to copy the HTTPS link.
With the URL copied, I returned to the command line and executed the clone command:
Editing the BASH Script
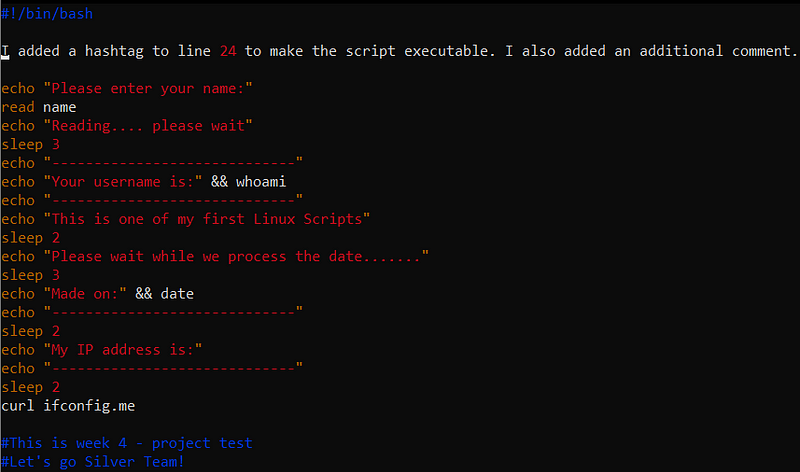
I navigated into the "LevelUpTeam" directory, listed the contents, and opened the "linux.sh" BASH script file for editing.
After making changes, I needed to alter the file permissions to execute it with the following commands:
chmod 777 linux.sh
./linux.sh
I encountered an error because I forgot to comment a line. After correcting this, I added the changes and committed them with a message:
git add linux.sh
git commit -m “made the script executable”

Pushing Changes Back to GitHub
To push my modifications back to GitHub, I utilized the command:
git push -u origin main
During this step, I entered my GitHub username and used the personal access token as my password.

Creating a Pull Request
The final step was submitting a pull request for my team to review my changes. I did this by selecting "Pull requests," then clicking "Create a pull request."

Success! The pull request was successfully created, and now I await feedback from my team regarding my edits.

Conclusion
This guide provides a clear pathway for contributing to your team's code on GitHub. By forking a repository, making edits, and submitting a pull request, you can effectively collaborate and enhance your project.
Thank you for taking the time to read this. I hope you found it valuable!
Jason Wood
@jwood9799
If you found this article helpful, please show your support by clicking the clap button below!
A comprehensive crash course for beginners on Git and GitHub, covering the essentials for effective collaboration.
An introductory guide to understanding Git and GitHub from a beginner's perspective, perfect for new developers looking to learn the basics.